


Today's installment of Wise Wednesday is brought to you by the husband and wife team of Nomadcraftsetc and Nomadglass as well as a new shop opening in March, Nomadcraftssupplies. After reading a very useful post they had written in the Etsy Forums, I asked if they would be willing to write a guest blog post about how they take amazing shop photos and they very graciously accepted! In the following article, they describe in intimate detail how they set up for the best product shots. Be sure to check out their shops, their website and their blog!
We have played with every sort of lighting source, been outside, inside, daylight, moonlight and spotlight...EVERYTHING you can think of for taking a great picture we have tried. We finally decided to stop over thinking the whole picture thing and decided to make it simple. VERY simple.
We have a LARGE window in our kitchen(small kitchen) and our dinner table is right next to it. PERFECT. Our camera is on its last leg. It is a hp photosmart r837 with 7.2mega pixels. We have it mounted on a $12.00 tri pod which we use to carry the camera. It cost, maybe, $80.00 about 2 years ago. This just proves you don't need a fancy camera. We put the camera on close up mode, with the flash off and set the exposure compensation to +.5. This effects the white balance and how steady the picture is.
For setup, all we do is prop up a piece of black or white poster board that we have folded in half (cost = $0.50) on the table with a coffee canister behind them so that they don't fall flat.

We use the (natural) light from the window as our lighting source. The best time of day is usually noon, but we can get great pictures in the morning and in the afternoon too. Depends on how well our camera is behaving! One of us will sit in a the chair on the side opposite where the light is coming through the window and get down to eye level with our product, this is the best position to get all angles.

Then we take 5(no more and no less) pictures of each item. We don't spend more than 2 hours per week actually taking pictures-we go with the philosophy that time is money.
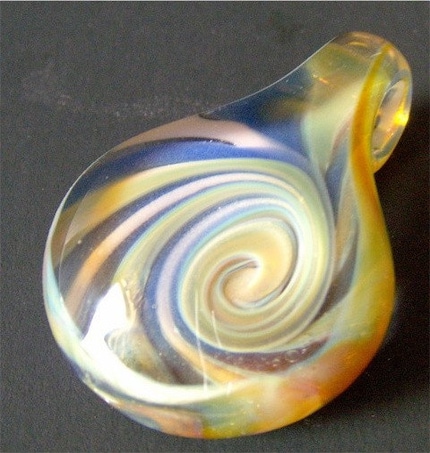
5 pictures gives us room to fill all picture spots on Etsy if they are all good pictures. These 5 pictures include: 1 focal shot, 2 angle shots, one shot of the back side of the piece and one size reference shot(like the items you see in a hand).
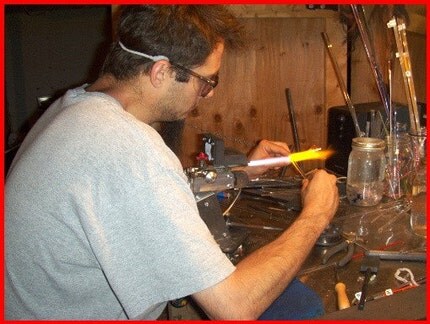
If one out of those 5 pictures isn't perfect we delete it and will replace it with one of us working in our shop.
Oh, and the only thing we have to do to our pictures is crop them-rarely do we have to lighten, darken or manipulate the picture in that way. We use Photobucket as our photoshop program. FREE and easy to use-plus online storage for all of our pictures so we don't ever lose anything.
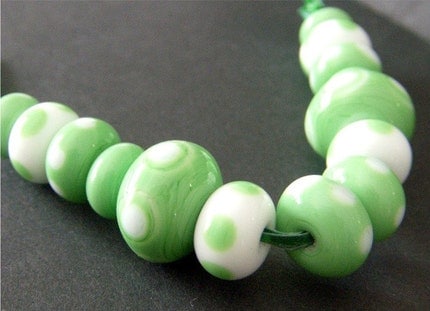
We do about 250 pictures per week for 2 shops so this method is what has worked for us as far as getting good pictures and time conservancy. So, our 5 best tips for getting a good picture(or what has worked for us anyways): 1. Have consistent backgrounds-depending on your items a neutral/plain colored background is great! 2. Natural light, whether from the window side or outside, works well. An overcast day seems to work the best. 3. TURN the FLASH OFF!!!! 4. Get pictures from all angles, this will let the viewer "Feel" the item with their eyes. 5. Once you find something that works-run with it! Don't change a thing!
Thank you so much for this post, I will be trying out your techniques as soon as my studio is unpacked!
Thank you so much for this post, I will be trying out your techniques as soon as my studio is unpacked!


.JPG)
.JPG)
.JPG)

.JPG)

.JPG)


2 comments:
Awesome post - thank you from someone who is also on a budget... and dreaming of upgrading my 7.2 mpx :)
Great tips. Now I need to check out your beads!
Post a Comment