Showing posts with label knit. Show all posts

Thursday, December 2, 2010

Coming Soon

I knit a very similar scarf recently and couldn't bring myself to part with it, and I knew that since I loved it so much, perhaps my wonderful customers would love it too so I made another!

Isn't it perfect?  The colors go perfectly together, and the yarns are all so soft!

I used a few different fibers, wools, merinos, *cashmeres*, all very soft, all very luxurious and all very warm.

What's not to love?  This scarf will be in my shop just as soon as I get model shots with it, which will hopefully happen today...so keep your eyes peeled!


**And to the individual who left a comment on my Happy Thanksgiving post asking about the Mohawk Beanie I made last year, if you could email me, that'd be great! :D **

Thursday, September 30, 2010

Finally Introducing The Pagosa Mitts!

The hat pattern came out ages ago, and now the matching mitts are here too!
 customizable length, one size fits most :D

I love this set, each piece is so versatile but they also go well together.
 The subtle spiral, the simple shape 

Not to mention the yarn used! The lovely LylianMae spun up some gorgeous gorgeous yarn specifically for this project and she'll have kits available for purchase that will include one or both patterns and the required amounts of yarn, how cool is that? She is definitely one of the nicest ladies to work with and I sincerely appreciate all of her help!
 the accompanying hat 

Interested in making your own Pagosa Set? You can purchase patterns for the hat and mitts separately on Etsy or on Ravelry or you can purchase them as a set for discounted price :)

Tuesday, July 27, 2010

Looky What I Helped Name!

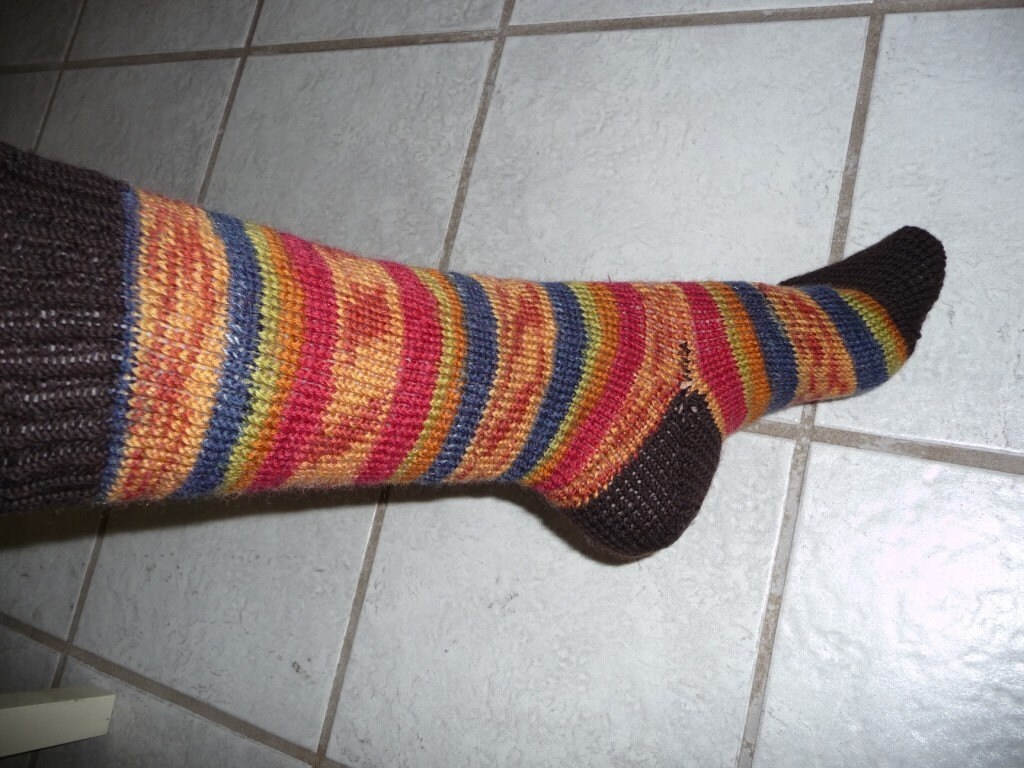
Some time ago Miss Ellen of EllenKatherine (a fellow Etsy Knitter's Team member) asked for help in naming her new socks I decided to take a look and see what I thought would be a good name for them.

Living in the southwest, I knew that these socks had all of the colors of our nightly sunsets (they are so gorgeous people, you must experience them for yourselves sometime).  I suggested the name Native Sunset and found out yesterday that she decided to go with my suggestion!

Cute socks, no?  They can be yours, just click here to find out more.

Tuesday, June 15, 2010

Another Collaboration!

I am so excited to announce to you all that I am in the works of another collaboration with another Etsy seller!  This time, the wonderful yarnie is lylianmae, a yarn and fiber dyer, spinner and knitter.
(This picture sssoooo does not do the yarn justice)*
I will keep you all abreast of the collaboration and let you know how the pattern is coming, in the mean time, check out her shop and don't forget that you can request for fiber to be spun into yarn if you love the colorway but don't spin yourself ;)
*My camera has died and I'm in the process of upgrading, more on this to come!

Monday, June 14, 2010

The Green T Turned Orange

Hello readers!  Today I want to share with you the creation of puravidaknits (Ravelry link).
She made her own version of the Green T! (Ravelry deets  or  get the pattern yourself!)
I absolutely love the color, don't you?  She used Alora from Rozetti Yarns
Isn't Pam just adorable?

Have you made your own project from one of my patterns?  Please share!  I love to see others' renditions :D

Tuesday, May 11, 2010

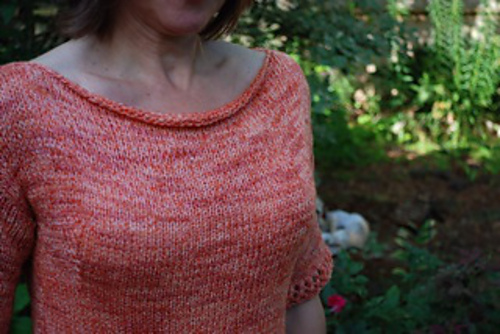
Citron


I used Southwest Trading Company's Bamboo for this project and have had the yarn in my stash for a long long time.  It was given to me (taken from?) my mother a long time ago and I wasn't quite sure what to do with it but when Citron came out, I knew. 

The project took my a little less than a week to complete, working on it in my off time (not plentiful during finals week) and I blocked it for a day before taking these pictures. 

Sorry no WIP photos, I'm very bad at taking those, but I think that since it was such a quick project, it can be forgiven this time.

It was nice to work on and complete a project that was just for me :)  Ravelry details here.

Tuesday, May 4, 2010

Tuesday Learn To Knit Day 14 - The I-Cord

Hello My Dear Students,

I know I didn't really come back and teach you new things the next week like I said I would, I got incredibly busy and these lessons fell by the wayside.  I know.  For Shame.  I apologize profusely and hope to get these back on track. 

This week, we're learning the I-cord.  I was teaching my friend how to knit this the other night and knew that I must show you all! The I-cord is used for a variety of things including straps on bags and various embellishments.  It is also good for knitting jewelry and those sorts of things.

Basically, knitting an I-cord is knitting in the round on a very small scale.

You will need two double pointed needles and whatever yarn you are using.

First, cast on probably 3 or 4 stitches (the more stitches, the thicker the I-cord.  Many patterns call for a specific number, so I'll leave that to them and give you the basics).

Instead of knitting on the side that the last cast on stitch is on, you will slide the stitches to the other end of the needle and knit the first cast on stitch first, instead of the last.

Continue with the rest of the stitches on the needle and when you complete the row, slide the stitches back to the other side of the needle (I hear making the type-writer sound "Ching" while doing this makes it easier ;))
Continue in this fashion until the I-cord is as long as desired and bind off.


If you have any questions, concerns or suggestions, please feel free to let me know :)

Tuesday, April 6, 2010

Tuesday Learn to Knit Day 13 - Inspiration

Instead of teaching you a new technique today, I am going to leave you with some inspirational knitting. We all need a little extra push sometimes and looking at the work of another knitter can be just what the doctor ordered. Now, I must be inspired to get back to my school work...


Saturday, April 3, 2010

New Things

I just wanted to show you all some new things that have made it into the shop, and things that will be making it into the shop soon ;)

This thick grey cabled slouch made its shop debut last week, I love the bright turquoise brim!

The lavender version of the lacy slouch appeared this week, along with the pattern

This yellow cabled bag made from vintage yarn and vintage fabric lining will be available next week :)

Tuesday, March 23, 2010

Tuesday Learn to Knit Day 11 - Stitch Patterns

Today we're not learning a new stitch so much as we are learning what cool things we can do with the stitches you already know, namely the knit and purl stitches.

These stitch patterns will let you practice both knitting and purling as well as show you some cool textures you can create with them!

First, stockinette:

This pattern consists of two rows: Knit one row, Purl the next row, simple, no?

Second, ribbing:

This pattern is very useful when making pieces that you would like to be stretchy, its pattern is some variation of the following:
CO 16
K2, P2 across row
You do this for all rows

Third, seed stitch:

This pattern is where you vary your knit and purl stitches, like so:
CO 16
K1, P1 across row
you will do this for all rows with an even number of stitches, for odd amounts, the second row will be to P1, K1 across all the stitches

Thursday, March 11, 2010

Projects

This 7 Foot Tie Scarf was listed in my shop the other day, its the second Tie Scarf I've made and I'm quite fond of it :D

I am also working on listing a chunky grey slouch hat with a bright turquoise band around the brim.


On the needles right now is a bright blue mohair sweater with a hood and I'm so excited to show you when its done!

Tuesday, February 23, 2010

Tuesday Learn to Knit Day 8 - Help with a Common Issue


One of the most common issues that newbie knitters face (myself included, long long ago when I began) is knitting too tightly.
Karin was having some troubles with the lace knitting I taught you about here because her stitches are too tight. To loosen up your stitches, really you just need a lot of practice knitting, you need to be able to realize that your stitches will not randomly fall off the needle if you loosen up your loops and let the stitches breath some. Its like learning how to drive, once you realize that the road will not jump out from under you, you can relax and enjoy the view a bit more. Knitting is the same way, it takes practice, patience, and the realization that you need to let go some :)
If you find that you continue to knit too tightly and it seems that there is nothing you can do about it (like my mother (hi Mom!)) then I suggest moving up a needle size or two. This will help the yarn breath because, for instance, if you are using a worsted weight yarn and size 8 or 9 needles, moving up to a 10 1/2 will allow the yarn a bit bigger gauge and it won't knit up so tightly naturally and you don't have to do anything about it.

Tuesday, February 16, 2010

Tuesday Learn to Knit Day 7 - Button Holes

This week's addition to the Knitting Lessons is in response to a request from fellow blogger and Etsy Shop owner Karin.

She asked if we could perhaps learn how to incorporate buttons holes into our knitting and this week I'm going to show you how using techniques you all already know! I will be showing you two different methods, one that I prefer for smaller buttons that is a little easier to "blend in" with your knitting and one that I use for larger buttons, or projects where you want to be able to see the button hole (like sweaters, etc)

Ok, for the smaller button hole all you have to do is knit to where you want the button hole to be, and YO then K2tog like I showed you last week. You only have to do it once! See how nice and petite that hole is? (you almost can't even see the hole its so small! but trust me, its there)


The other method uses only BO and CO. Knit to where you would like the button hole, BO as many stitches as you think you need, then continue knitting. You're going to have a hole on your needles that'll look like this:

On the following row, knit to the hole and cast on the same number of stitches that you had bound off, continue knitting in the pattern you chose.
I'm not giving you a specific project this week, because I'm sure many of you are already coming up with your own ideas for pieces you'd like to create. If you are wanting to practice the button holes on a smaller project, I suggest wrist cuffs (bracelets, basically) or a neckwarmer (a shorter scarf secured with buttons around the neck).

Tuesday, February 9, 2010

Tuesday Learn to Knit Day 6 - A Simple Lace Pattern

For this week I am teaching you a simple lacy looking pattern that is great for scarves :)

I hope you found some gorgeous, soft yarn that you are looking forward to using because this is our first apparel project!

Ok, here we go. Cast on an odd number of stitches in the width that you want your scarf to be (usually somewhere around 21 stitches if you're still using the needles we used for the washcloths). Cast on more for a thicker scarf and less for a thinner scarf.

Knit the first row as I taught you in this post.

The first stitch of the next row: Insert your right hand needle through the stitch as if to knit but don't wrap and simply slip off the left hand needle onto the rhn (right hand needle) leaving the yarn behind the work. This is called Slipping the Stitch Knitwise or sl or sl st.


Before the next stitch, wrap the yarn around the rhn from back to the left around the front and to the back again as if you are wrapping it around the needle on a knit stitch. This is called a Yarn Over or YO.


Now, insert your rhn into the next TWO stitches on the lhn knitwise. As in, take the right hand needle and insert it through the second stitch as if to knit and then through the first st as if to knit so that you have both sts. Wrap the yarn around the rhn and remove the sts as if you were simply knitting one. this is called Knitting Two Together or K2tog.

For the remainder of the sts on the lhn, continue to YO then K2tog across.

At the beginning for each row, sl the first st knitwise and YO, K2tog to the end :)

When the scarf is the desired length, knit one more row then bind off as shown in this post.

I can't wait to see what you all make!


Tuesday, January 26, 2010

Tuesday Learn to Knit Day 4 - Purling

Alright, so how did your first projects come along? I would really appreciate some feedback on these lessons so that I know what I can improve in the future :) Also, suggestions for future projects and questions are always welcome!

This week we are going to continue with dishcloths (because I'm teaching you the "other" basic stitch and I don't want you to get bored with a big long scarf or project and also because I'm sure you still have a little bit more of the cotton left). We are going to make a checkerboard patterned cloth this time :)


First, CO (cast on) 24 stitches like I showed you in this post.

Knit the first 4 sts, given the directions in this post.

Now for the purling: With the 4 K (knit) sts in your right hand and the remaining 20 sts in your left, take the yarn from the back of the work between the two needles so that it is now in the front.
Insert the right hand needle from the back to the front of the middle of the stitch (basically, do a knit st backwards). Wrap the yarn around the needle from right, around the back, to the left and back to the front as shown.
While keeping this new loop on the right hand needle, pull the rhn (right hand needle) back through the stitch in the direction you put it in and slide the st off the lhn (left hand needle).

Purl 3 more sts so that you now have eight sts on the rhn.

Continue in this pattern (K4, P4) to the end of the row.

Repeat 4 more rows (5 total) in this pattern.
For the next 5 rows, P4, K4 all across the needle.
Every 5 rows, switch back and forth so that you form a checkered pattern. Continue in pattern as set until desired length and bind off and shown in this post.

Related Posts Plugin for WordPress, Blogger...